Oh Well
“So Vague” – Oh Well
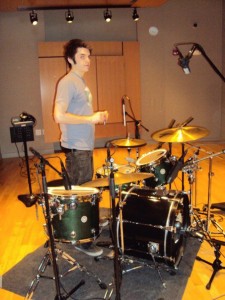
On Tuesday May 14th 2010, Dakota Jakiela and I got ready for our first tracking session of “Oh Well.” For our first session our main goal was to get drums and bass completely tracked and as much guitar as possible. We set up the drums in the live tracking room underneath the drum cloud and the guitar in the isolation booth with a talk back. We put the bass in the control room running through the Avalon DI box.
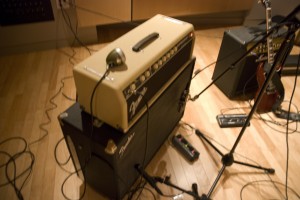
For microphones we used the Beta 52 on the kick drum. We put an SM57 on the bottom of the snare drum and a KSM 44 on the top of it. We used the KSM 44 on top because during class we decided that the KSM gives us a fatter sounding snare drum than other microphones. We used the SM81 on the high hat and the KM184 on the ride cymbal. We used the MD421 as our tom mics because in comparison to the Beta 98’s they sound more full and warm. We used the AKG 414’s as overheads and the SF24 as the room mic. The room mic was placed about fifteen feet in front of the snare drum. We close mic’d the guitar amp with both a SM57 and a Violet Design Amethyst. We picked the Amethyst because it has a more vintage sound that we wanted for the band. We also ran the guitars through the Avalon preamps. We wanted bigger, warmer sounding guitars that I think the Avalon preamps bring.
For our second session we recorded vocals and guitar overdubs. When the band showed us their demo, the vocals were affected pretty heavily. They made it on garage band and used the megaphone effect on their vocal track and wanted that same kind of sound. So I thought about it for the next couple days and got the idea to re-amp the vocals through his guitar amp. We set up the Microtech Geffel in the isolation booth and ran it through the Supre pre amp and then the Drawmer 1968 compressor. From there we patched it to the mult, and ran one signal to a channel clean and then the other out through the wall panel. From the wall panel we used an adapter and plugged it straight into the guitar amp. We mic’d the guitar amp the same as when we recorded the guitar and also ran it through the Avalon preamp. For backing vocals we used the 520 DX plugged directly into the guitar amp. The microphone was in the same room as the amp so we got some cool feedback, which added a different effect to the backups that the lead didn’t get.
I went with a different approach for this track when mixing my drums. I started off with raising my room mics to almost zero dB. I cut out allot of the highs out with a low pass filter at about 5K. I brought in the overheads in after and put a low cut at about 250hz on the overheads. After I had a decent balance between the rooms and the overheads I then added in the rest of the drums. I added in kick and snare first. I mixed in a little more top than bottom snare to get more of the drum sound instead of the snap. I tried to EQ as little as possible for most of my drums only cutting out abnormalities in the microphone. I compressed the kick and the snare top both at about a 8 to 1 ratio because those cut through the most and I needed to keep them under control. After I added them in, I balanced the rest of the drums out so I had a decent sounding drum set. I added in the shaker after and I put a low-cut filter on them to make them more present in the drum set. From there I balanced in the bass guitar with the kick. I EQ’d the bass to fill in the low end so I boosted around 60hz and then cut some abnormalities in the midrange and added a low pass filter at about 3Khz to cut out the high fret noise. The kick drum was EQ’d with some of the lows cut of to make room for the bass and I added some 1-2Khz to get more of a rock kick sound.
After I had a good balance between drums and bass I moved onto guitar. I had a vision for guitar; I wanted them to sound like Weezer’s “Say it ain’t So”. In the song the two separate guitar tracks are panned one hard left and the other hard right. So I panned the lead guitar hard left and the rhythm guitar hard right. I when I did this I only used one guitar track for each. But it was sounding rather empty so I took each of those other guitar tracks and panned the lead at two o’clock and the rhythm at ten o’clock. This made the guitars sound more full. As for EQing the guitars I put a low-cut filter on at about 200hz to allow space for the bass and the kick drum. I put a compressor on the guitars with only a 4:1 ratio on it to keep the dynamics under control. So after I had a good balance between the band I started looking at the vocals. I had three tracks for the vocals, one clean and two through the guitar amp. The clean one was panned center and the guitar amp mics were panned at ten and two. I used more distorted vocals than clean vocals in the mix because it really made the vocals cut and gave the song a really cool sound. The backup vocals were EQ’d differently to get them to sound different for the call and response section of the song. I put a high-cut at 3Khz and low-cut filter at 400hz on the backup vocals. This made them sound like a really distorted telephone. I also turned them down in the mix so they were noticeably lower than the lead vocals to further make them sound like a response and not like the lead vocal part.
Automation consisted of automating the levels of the guitars and the vocals. For the verse, I brought down the guitars so the bass line would come out a little bit more. The feedback section in the bridge was automated the most of the guitars. The vocals also were automated. The backing vocals were brought up and down for the verse and chorus parts so that they complemented the lead vocals perfectly.

